LinkHMS is a powerful tool for managing your everyday operations. It can fit doctors who do individual practice and larger hospitals with a number of staff who perform various tasks under different roles.
In this article, we will brief you on the user roles, what they do, and how they interact with each other across the clinic.
User roles and their main functions
- The Clinic Administrator manages the clinic users (doctors, lab scientists, nurses, and receptionists) in the clinic. Clinic Administrators define the roles of the rest of the users, what departments they are assigned to, what services they’re allowed to provide, and at what cost.
- Receptionist: Their main function is to manage the list of appointments for both walk-in and arranged appointments. The Receptionist also manages the doctors’ work hours schedules and is able to view the list of the services provided during the visit to generate invoices to bill patients at the cash desk or submit to the insurance company.
- Nurses have access to the basic patient profiles in order to collect the vitals pre-visit as well as assist with the procedures and patient profile completion. Nurses record accurate and timely information for further usage by doctors for diagnoses.
- Doctors review and update patient health records, document diagnoses, request lab tests, create treatment plans, and make prescriptions. Doctors also access their schedules to manage appointments and view upcoming patient visits.
- Lab Scientists receive test orders from doctors, perform the required tests, and enter the results into the system. Lab Scientists update the lab test results for doctors to review and use for further diagnoses and treatment plans.
How does LinkHMS work in a nutshell?
LinkHMS is designed to fit a variety of clinics and organizations. In this piece, we will explain how the workflow works across the clinic.
If you’d like to know more about the workflow for the Individual Practice – here you can find more information.
Step 1 – Patients’ admission
Everything starts with the Patient’s admission. The Receptionists have access to the database of the patients and the doctors’ schedules across the clinic, as well as the taken and empty timeslots.
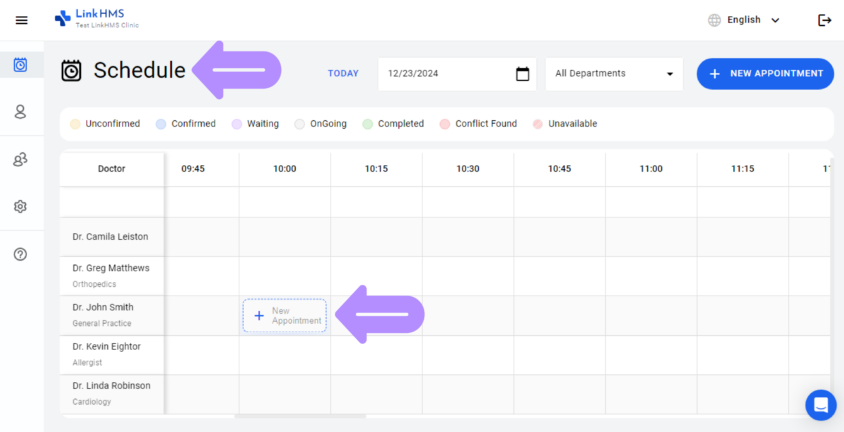
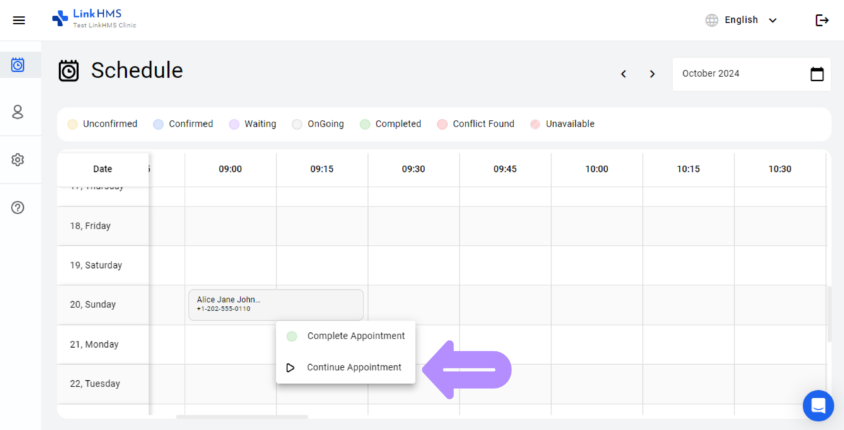
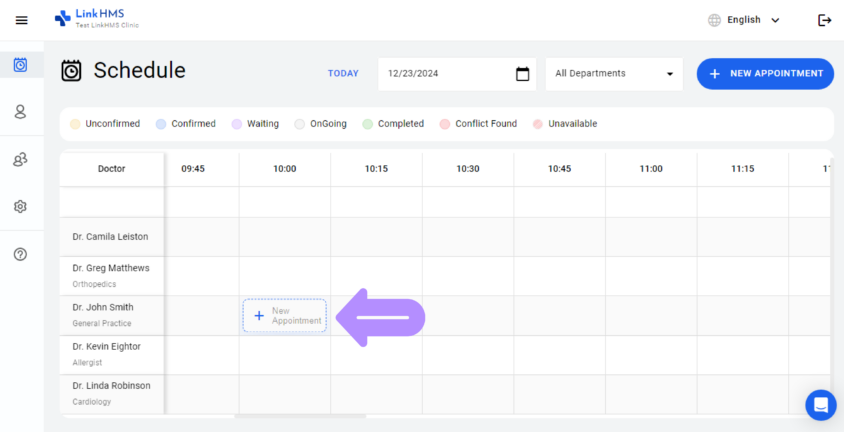
The home screen of the Receptionist is the Schedule Tab.
When the patient is trying to arrange an appointment in any way or walk in – the Receptionist chooses the empty slot in a doctor’s schedule and creates a new appointment.
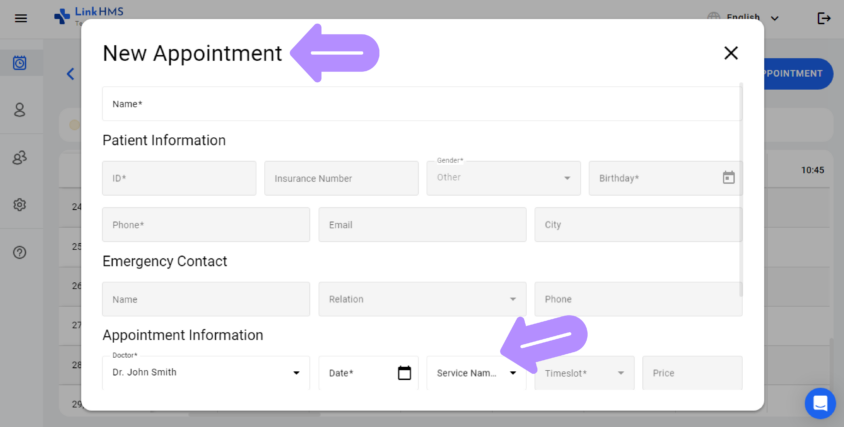
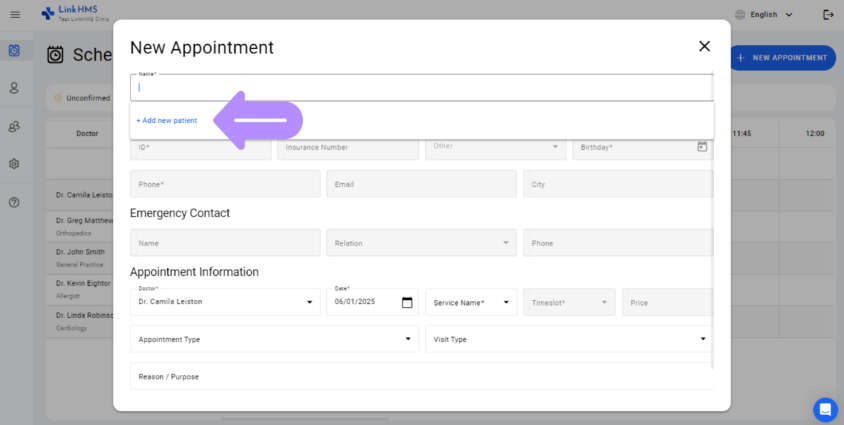
While the Receptionist creates the New Appointment option, they can arrange an appointment for the existing patient if their name is found in the system or create an appointment and new patient record simultaneously.
LinkHMS simplifies patient admission and assumes the same workflow for both walk-in visits, phone-arranged visits, and follow-up appointments that patients schedule at the reception. The Receptionist has to find an available time slot with a doctor of the needed specialty, choose the patient, and add the visit to the system.
If the system doesn’t find a patient record by name – it will offer to create a new patient in the same tab.
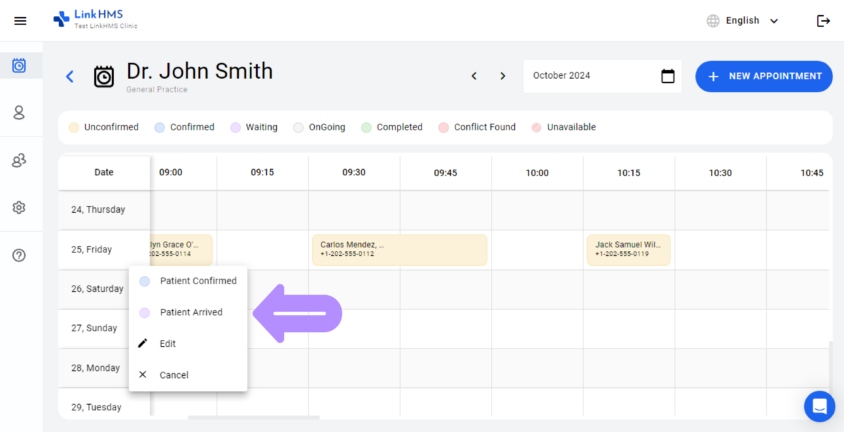
Once the patient arrives at the set time to visit a doctor and is ready for the doctor’s admission, the Receptionist changes the appointment status to Patient Arrived. Then, the Nurse or Doctor can take it from there.
Step 2 – Patient profile completion & clinic workflow start
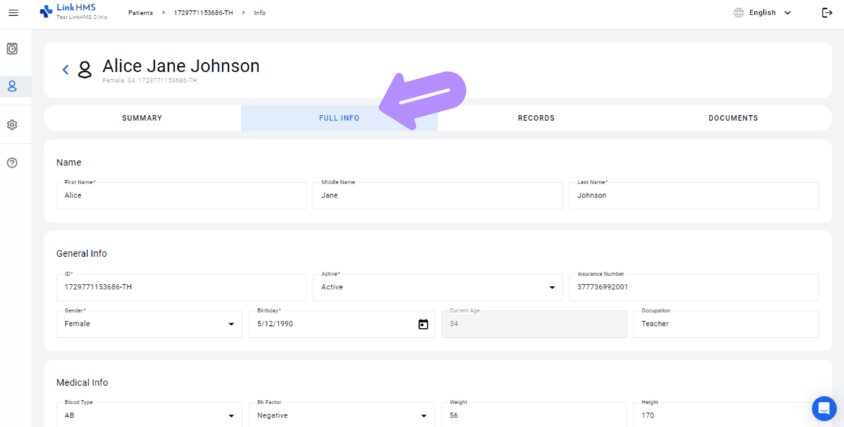
If, for the first visit, you’ve created a new patient’s profile – it makes sense to complete the Full Info Tab in the Patient Card. This information is not related to a particular visit and serves as a general record.
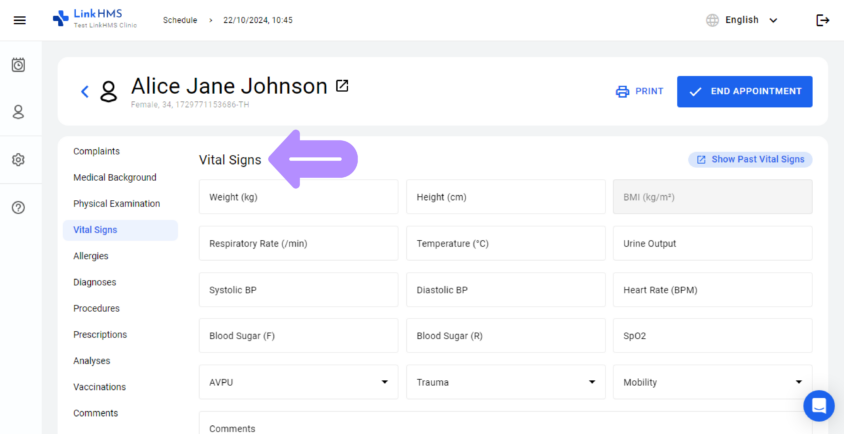
The Nurse or the Doctor proceeds with the completion of the details of the current visit, such as:
- Complaints,
- Medical Background,
- Physical Examination,
- Vital Signs,
- Allergies.
LinkHMS is flexible, and those actions can be performed by a Doctor or a Nurse. However, Nurses can’t perform important actions like adding Diagnoses, Prescriptions, etc.
Step 3 – Visit to Doctor
Once the essential pre-visit information about the patient is collected by the Doctor or the Nurse – the Doctor can pick up the visit from there and conduct the visit further.
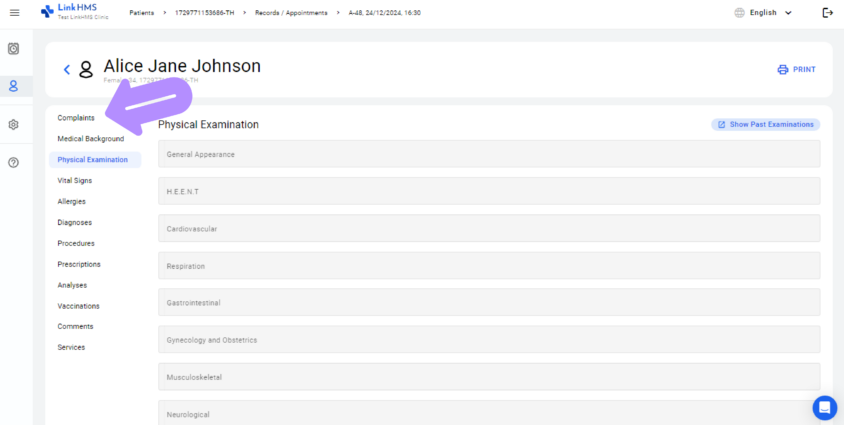
During the visit, the Doctor navigates through the visit workflow by switching between the tabs in the left-side menu at their discretion. For example, completing the Allergies tab is not necessary to finish the visit.
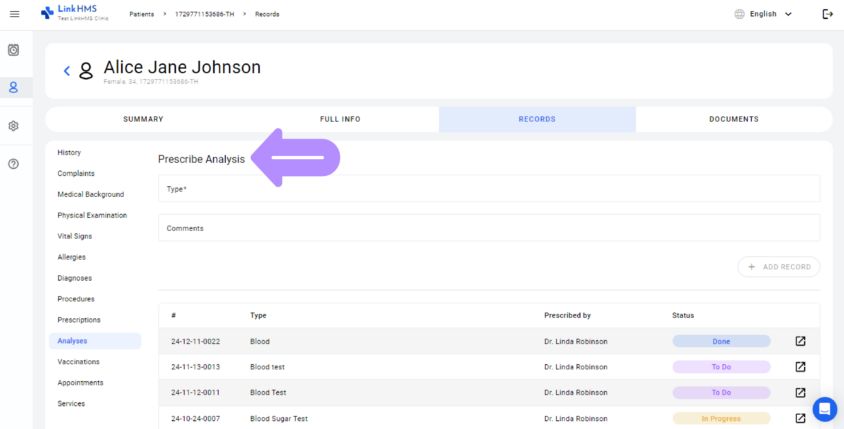
If required, the Doctor requests lab tests based on the patient’s symptoms and complaints. All such requests are automatically sent to the Laboratory tab, and the Doctor is notified of their status updates.
Step 4 – Tests & analysis
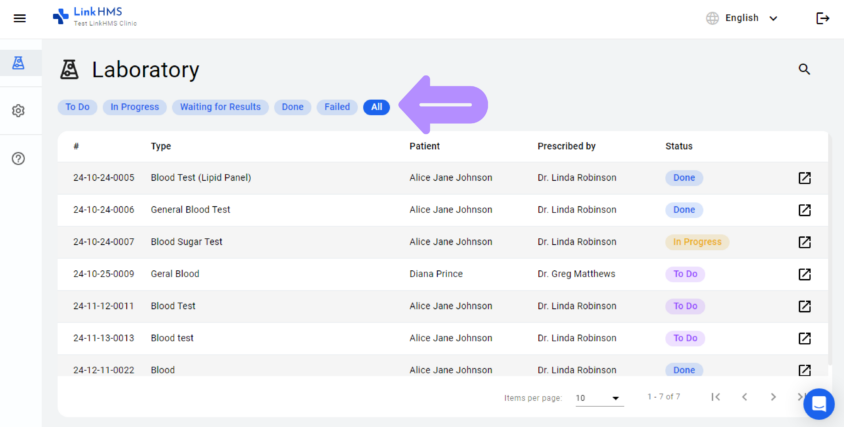
The Laboratory Tab is used by Laboratory Scientists to conduct lab tests and update the progress status when the Doctor only gets the analysis results in the Patient Tab.
Once the Doctor requests the lab test, the Laboratory Scientist gets a new test request on their to-do list.
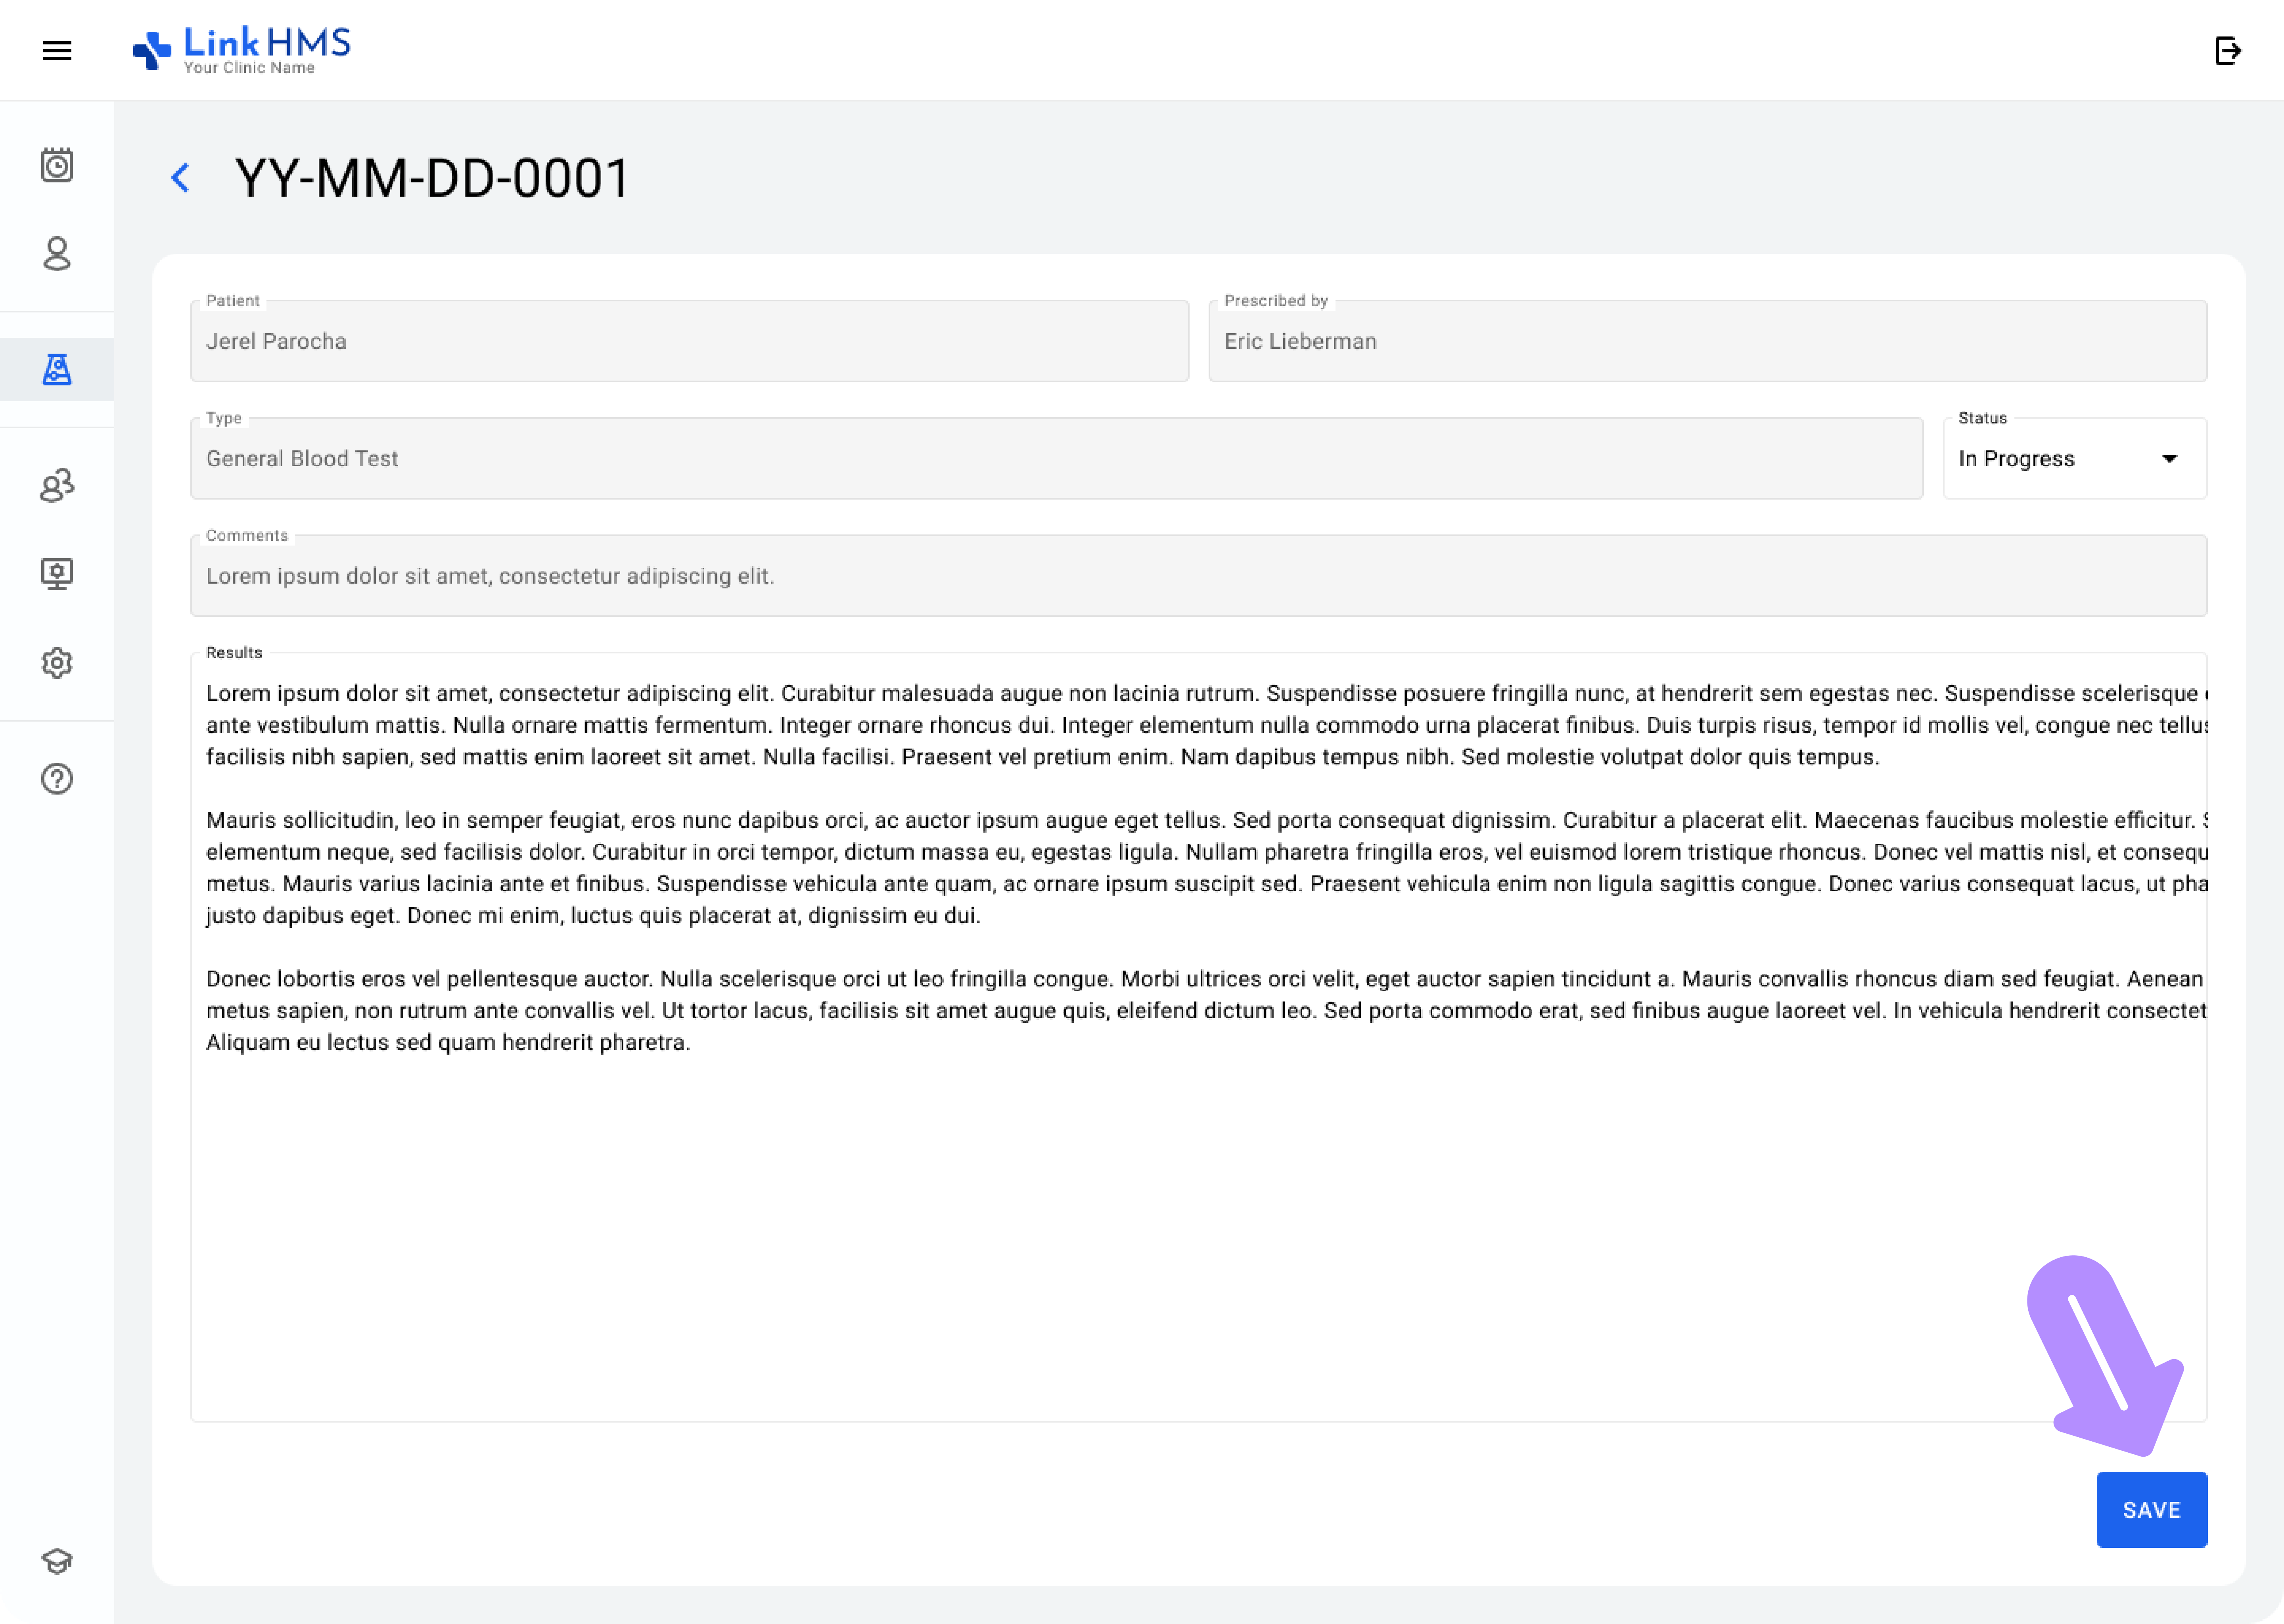
The Laboratory Scientist reviews the assigned tests and changes the statuses based on the progress. Laboratory Scientists conduct the tests, input the analysis results, and save them for further use by the Doctor.
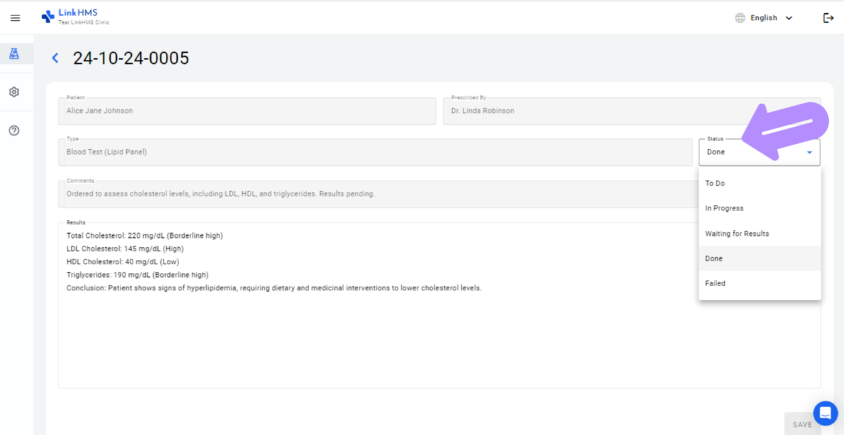
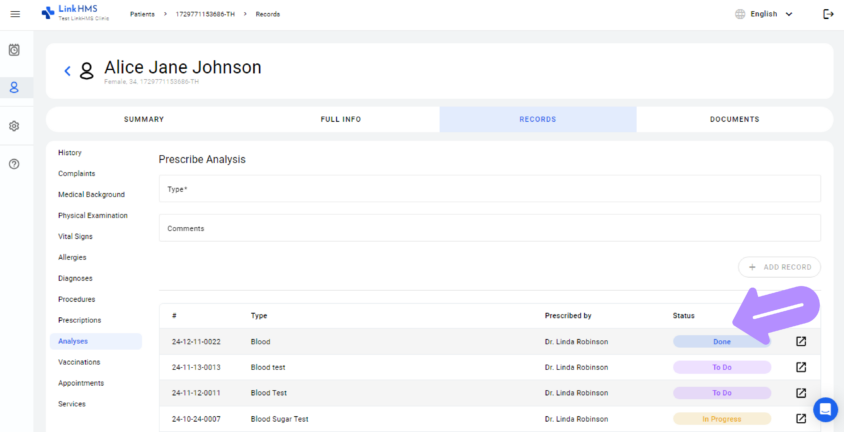
Lab Scientists can select one of 5 statuses for the test: To Do, In Progress, Waiting for Result, Done, or Failed.
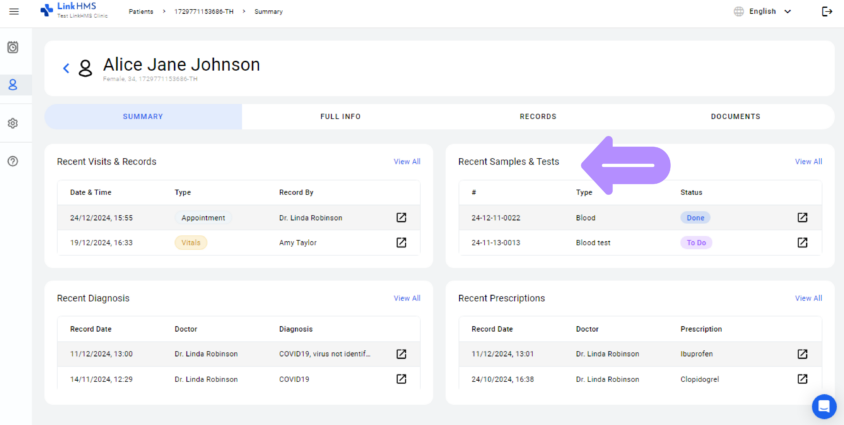
The Doctor can see the status of every test on the Patient’s Dashboard.
Step 5 – Diagnoses & prescriptions
In LinkHMS, every visit can be completed without filling in any forms. Records can be added as needed at your discretion.
For instance, during a first visit where the diagnosis cannot be determined without further analysis, the doctor can record vitals, document complaints, and prescribe tests through LinkHMS before completing the current visit. A follow-up visit can then be scheduled, during which the diagnosis can be established. This approach ensures that all records are maintained in chronological order.
Any diagnosis is made based on recent symptoms, medical specialists’ findings, and test results. The Doctor can instantly review the completed analyses when the Laboratory Scientist sets the status Done.
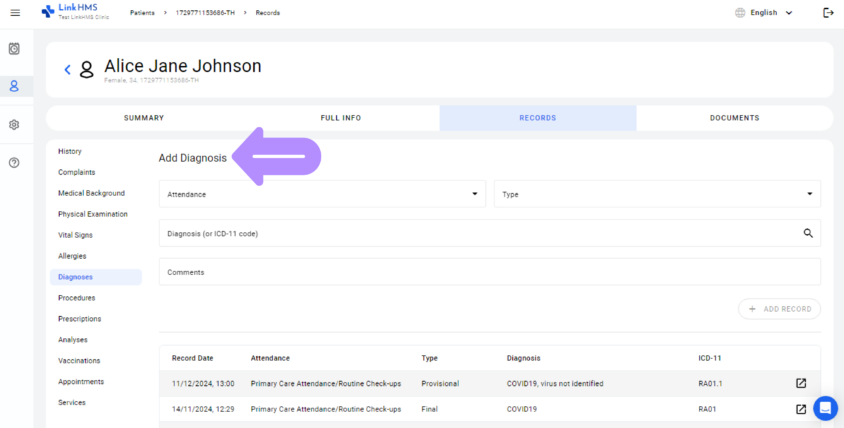
When the Doctor is ready to proceed with diagnoses, they start adding supporting comments and choosing the relevant diagnostic codes to save the diagnosis.
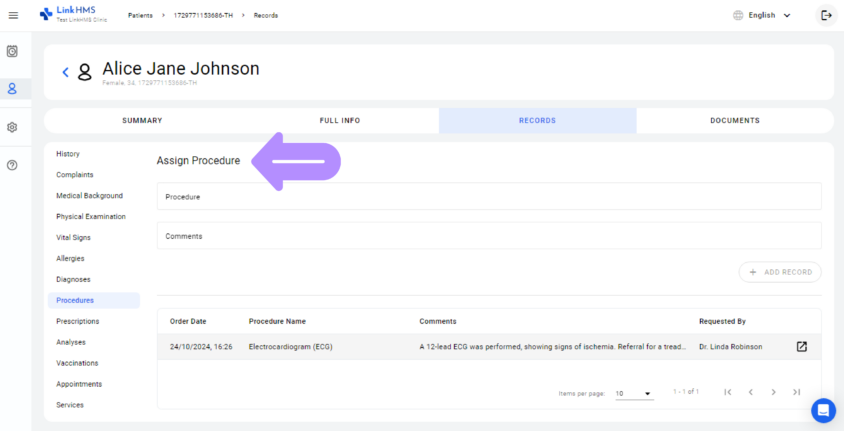
The Doctor also records all the assigned procedures, adds follow-up notes, and leaves required comments.
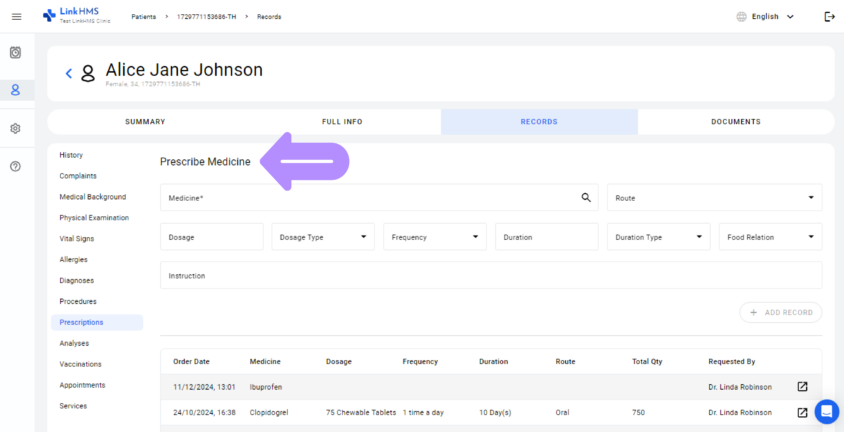
Finally, the Doctor prescribes medicine, determines the correct dosage, and provides clear instructions on usage.
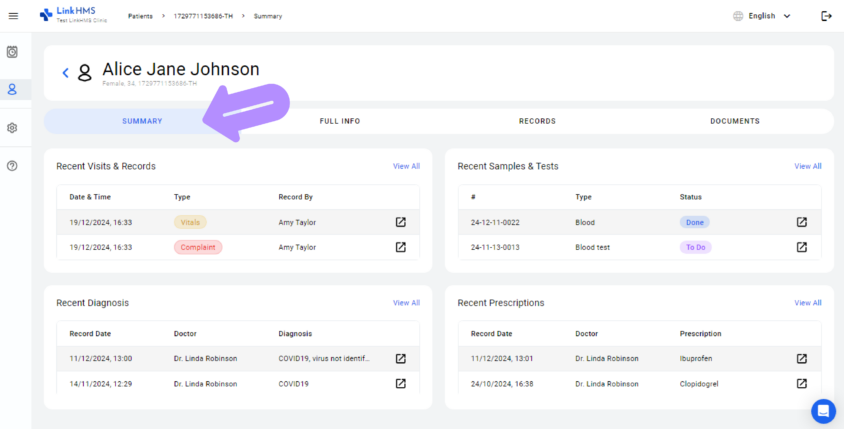
Diagnoses and Prescriptions remain saved in the patient’s records and can be used for future reference by authorized clinic staff.
Step 6 – Post visit & invoices
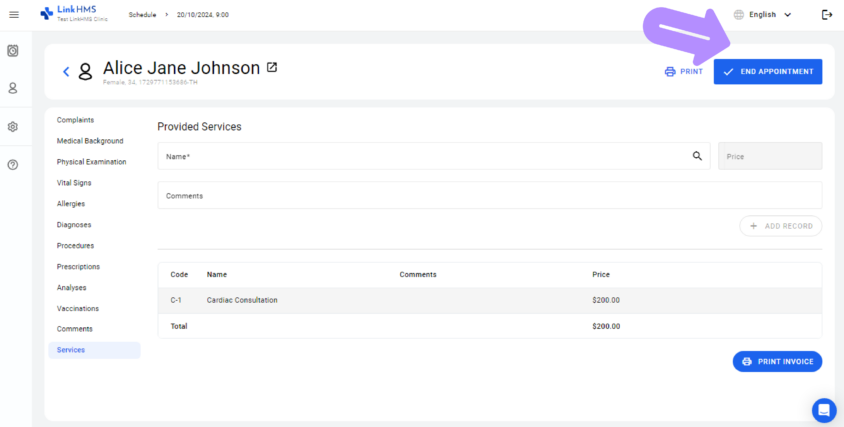
At the end of every visit, the Doctor selects the End Appointment option.
After the Doctor completes the consultation and updates the appointment status to Completed, the Receptionist can review the patient’s visit summary.
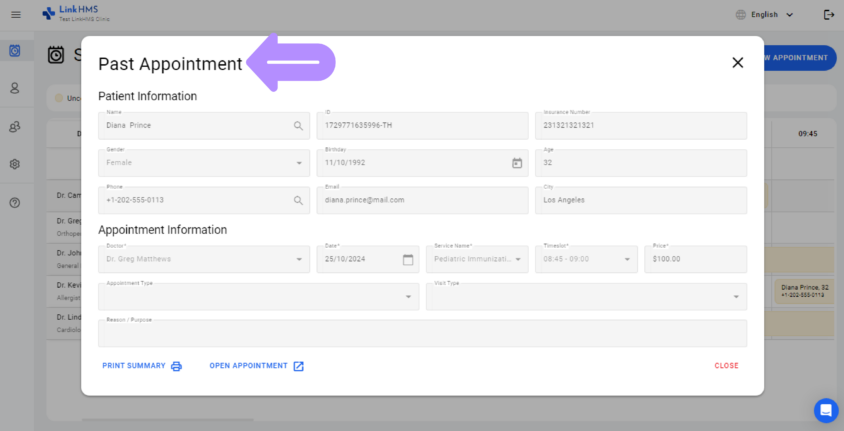
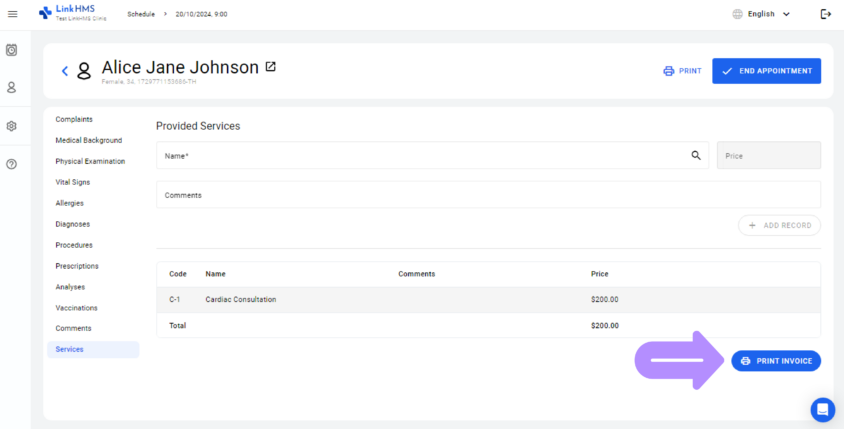
To generate an invoice and present it to the patient once the patient arrives at the desk past visit – the Receptionist finds the Patient’s Profile, opens their profile, and finds the current appointment there. The Receptionist opens the full appointment details, and they can generate an invoice by selecting Print Invoice.
At the end of the visit, the Receptionist can schedule a follow-up appointment in accordance with the doctor’s recommendations and available slots in the Schedule Tab.
Advanced LinkHMS
Thanks for reading this short intro about workflows in LinkHMS.
We have prepared detailed articles on workflows for each clinic staff member to provide more in-depth guidance.
How to use LinkHMS as a doctor?
How to use LinkHMS as a clinic admin?

